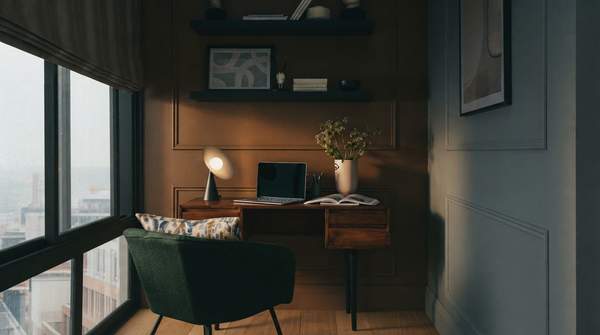
An effective home office ergonomics setup is built in a specific order: adjust your chair first, then your desk and keyboard, then your monitor, and finally your accessories. Working from the ground up matters because each adjustment depends on the one before it — your keyboard height only makes sense once your chair is set correctly, and your monitor position only helps once your elbows are in place. The goal throughout is a neutral posture: feet supported, spine supported, wrists straight, and eyes level with the screen. This guide walks you through that sequence as a diagnostic checklist you can run on your own workspace today.
Step-by-Step Ergonomic Checklist: Chair Adjustment
Start with your chair, because it anchors everything else. The University of Pennsylvania's environmental health and safety office emphasizes that maintaining a neutral posture at the computer begins with your seat: keep your feet on the floor, or on a footrest if you have to raise the chair to get the correct arm position. Chair height should allow your feet to rest flat, with your knees level with or slightly below your hips, which keeps your hip angle open and your lower body properly supported.
Next, check your back support. Your chair back should support the natural curve of your lower spine — a chair with lumbar support helps maintain that curve, and proper back support prevents strain and muscle fatigue in the lower back. If you are working from a dining chair or other non-office seating, a firm cushion or rolled towel placed between your lower back and the chair back can provide similar support. Do not rest your weight on your elbows; your torso should be held up by the chair, not your arms.
Desk, Keyboard, and Mouse Positioning for Neutral Posture
With your chair set, turn to your working surface. Your elbows should sit at roughly the height of the table, so your forearms can rest comfortably while you type. If your desk is too high and cannot be lowered, raise your chair until your elbows align with the surface and use a footrest to keep your feet supported — this is exactly the trade-off Penn's guidance anticipates.
Position your keyboard and mouse so your wrists stay straight and your upper arms remain close to your body in a neutral position. Keep your shoulders relaxed, and avoid bending forward or stretching excessively to reach your mouse. As a final check, your arms and wrists should be parallel to the floor as you type. Organize your workspace so everything you need is within easy reach, and use document holders or phone stands to minimize repetitive reaching.
Optimal Monitor Placement to Reduce Neck and Eye Strain
Your monitor comes last because its correct height depends on your seated posture. Place the screen directly in front of you, about an arm's length away, so you are not twisting your neck or squinting at a distant display. For height, your eyes should be level with the top third of the screen — meaning the top of the monitor sits at or slightly below eye level.
This placement helps prevent both neck strain and eye strain. A monitor that sits too low is one of the most common home office problems: it pulls your head and shoulders forward into a hunch. If your screen is too low, raise it with a stand, a riser, or even a stack of sturdy books — the principle is what matters, not the equipment. Keep the screen directly in your line of sight rather than off to one side, so your neck stays square to your work.
Ergonomic Solutions for Laptop Users
Laptops deserve special attention because they carry a built-in design conflict. Penn's safety office is blunt about this: laptops are not designed to be used as your primary computer. Because the monitor is attached to the keyboard, when the monitor is at the correct height, the keyboard is not — and when the keyboard is at the correct height, the monitor is not. You cannot achieve neutral posture with the laptop alone, and the low screen position causes people to hunch forward, creating poor neck and back postures.
The solution is a two-step fix. First, elevate the laptop so the screen reaches eye level, using a laptop stand or a riser. Second, add an external keyboard and mouse so you can type with straight wrists and relaxed shoulders while the screen sits high. This separates the screen from the input devices, letting you adjust each independently and restoring the possibility of a neutral posture. If you use a laptop only occasionally, the risk is lower, but for regular daily work, the stand-and-peripherals setup is the adjustment Penn's guidance treats as necessary.
Beyond the Setup: Lighting and Movement
A well-arranged workstation is only half of the equation; your habits complete it. Take regular breaks — roughly every half hour, stand, stretch, or walk for a few moments. If you have a standing desk, alternating between sitting and standing supports circulation, and an anti-fatigue mat can make standing periods more comfortable. Movement breaks also counter the concentration drain and fatigue that poor ergonomics can cause.
Lighting and reach complete the picture. Position your screen to avoid glare, and keep frequently used items — phone, documents, coffee mug — within easy reach so you are not repeatedly twisting or stretching. These small habits compound: ergonomic hazards are among the top causes of workplace injuries in office environments, contributing to musculoskeletal disorders, chronic back and neck pain, and carpal tunnel syndrome, according to labor statistics cited by ergonomics equipment maker LINAK.
Your Home Office Ergonomics Diagnostic Checklist
Run through this checklist in order, comparing your current setup against each benchmark. Where a check fails, make the listed adjustment before moving to the next row — later checks depend on earlier ones.
| Component | Ergonomic Principle | Recommended Adjustment | Benefit |
|---|---|---|---|
| Chair height | Feet and knees position | Feet flat on the floor or a footrest; knees level with or slightly below hips | Open hip angle and proper lower body support |
| Chair back | Lumbar support | Back supports the natural curve of the lower spine (cushion or towel if needed) | Prevents strain and muscle fatigue in the lower back |
| Desk and keyboard | Neutral elbows and wrists | Elbows at table height; wrists straight, arms close to the body and parallel to the floor | Relaxed shoulders and reduced wrist strain |
| Monitor | Height and distance | Arm's length away, directly in front, eyes level with the top third of the screen | Prevents neck and eye strain |
| Laptop | Screen–keyboard conflict | Laptop stand to raise the screen, plus external keyboard and mouse | Independent adjustment of screen and inputs, enabling neutral posture |
| Accessories and habits | Reach and movement | Frequent items within easy reach; breaks every half hour to stand or stretch | Less repetitive reaching; better circulation and focus |
By the end of this sequence, you should be able to sit with feet supported, back curved naturally, wrists straight, and eyes level with the top of your screen — the working definition of a neutral posture. Any row you could not satisfy points to your next concrete fix.
Achieving Lasting Comfort and Productivity
Regularly review and adjust your home office setup using the diagnostic checklist to maintain an ergonomic posture. Setups drift — chairs get lowered, monitors get pushed back, laptops get used without their stands — so re-run the checklist periodically, especially after changing furniture or work habits. One boundary to keep in mind: this guide covers ergonomic setup for computer-based desk work and does not replace medical advice; if you have existing pain, consult a doctor. The measurable indicator of success is reduced physical discomfort — less neck, back, and wrist pain — and improved focus during work sessions. If discomfort persists after your adjustments, that is your signal to revisit the checklist or seek professional evaluation.